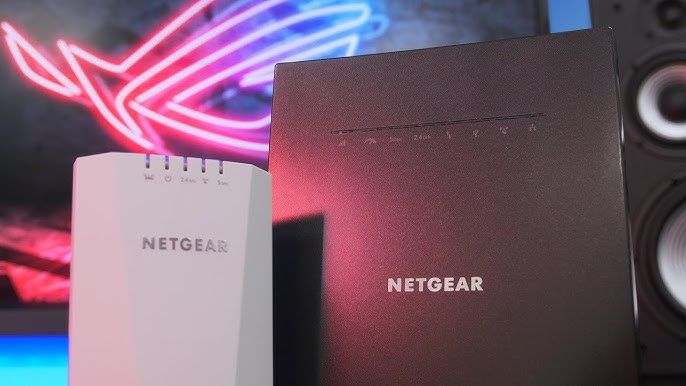
Nighthawk meshes are the Netgear products. They provide an advanced home WiFi networks. These products include a router and satellites in a package to cover a vast area of your home. It has various advanced features like parental controls, limit the numbers of access, etc. which makes your life easy. Here are the steps on how you can install the router and satellites.
How to Install Nighthawk Mesh?
1) Unbox the equipment. Make sure you have all the components in the box. You need the main router and additional satellite units.
2) Nighthawk has its own app which is “Nighthawk app”. Download the app from play store, app store or from this URL nighthawk.app.com.
3) Next step is to plug in the main router in the wall socket.
4) You have to now connect the router to the modem with the help of Ethernet cable. For that, you have to attach the one end of the Ethernet cable in the LAN port of modem and the other end of the cable to the WAN port of router.
5) Now, wait for the LED lights to stabilize, it takes few minutes.
6) Open a Nighthawk app and create your account or log in to the existing account.
7) Then, app will direct you to scan the QR code on your router or will ask you to enter the information manually to start the setup process.
8) You have to choose your WiFi network name (SSID) and password.
9) Create a Nighthawk mesh router login password.
10) Now, you have to add satellite units after setting up the main router. Turn on the power of all the satellites you want to add. And follow the app instructions to connect those satellites with the main router.
11) You have to place the main router and satellite within the range of main unit for setup. Once connected you can move the satellite. You can use the app to find the best spot and signals.
12) Your setup is completed. Now, you can test the network by connecting devices and check the speed.
Note: Keep the firmware updated for better and secure WiFi network also keep monitoring the network for best output and usage.
Your Nighthawk mesh setup is done. If still any problem occurs during the setup process, you can follow troubleshooting tips.
Troubleshooting Tips
Here are some troubleshooting tips you can follow:
1) Ensure satellites are placed within optimal range of each other and avoiding obstructions like walls, appliances etc.
2) Unplug the main router and all the satellites, wait for 30 seconds and plug them back in the wall socket.
3) Utilize most from the Nighthawk app for setup, placement and management.
4) Ensure that the latest version of firmware is installed in all the devices. And to check the update, you can use the app.
5) Make sure your device is connected to the correct WiFi network during setup.
6) If still problem is not resolved, you can reset your mesh units to factory setting by holding the reset button for 10 seconds. But you have to repeat the Nighthawk mesh setup process, after reset.
7) Ensure that your devices are compatible with the mesh system, as older devices may have connectivity issues.
Conclusion
Nighthawk mesh is very easy to install. Just follow the above mentioned steps. It can even run multiple devices by connecting to mesh system. And with the help of Nighthawk app, you can access those devices from anywhere around the world. These troubleshooting tips should help you resolve most common issues with your Nighthawk mesh system. Enjoy your improved WiFi coverage.


