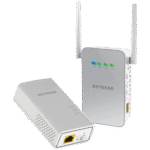
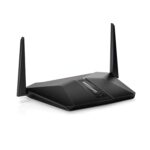
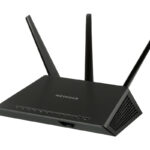
The Orbi WiFi system is a mesh networking solution, and it is a Netgear product. It made in such way that provides vast WiFi coverage. It can be used in a home by using multiple units that work together to eliminate dead zones and improves signal strength.
Many models offer tri-band technology, which includes a dedicated band for communication between the router and satellite, improving overall speed and performance. Here, we will learn the setup of Orbi WiFi system.
Here are the steps you have to follow for the setup of Orbi WiFi system:
- Download the Orbi app from the play store or app store.
Once the download is complete, open the app and create an account. If you already have an account then you can log in to your NETGEAR account. - After you are login. Scan the QR code from your router. Now, select your Orbi product and number of satellites you are adding to it. Then click on continue.
- You can restart you modem. Firstly, locate your modem and unplug your modem. Now, plug in your modem and wait for the LED lights to stabilize.
- Connect your router from the modem using Ethernet cable. Insert one end of the Ethernet cable in modem LAN port and other end in the router yellow WAN port.
- Plug in your router in a wall socket.
- Wait for the router to start. Your router light pulses white in beginning and then transformed into solid white LED light. All these process, take about 5 minutes.
- Now plug in your satellites near your router. And sync all your satellites from the router.
- Press the sync button on your Orbi router, within 2 minutes press the sync button on each satellite. If Orbi pink light is displaying on a satellite then it means router and satellite is failed to sync. But if the solid blue light is displayed it means router and satellite is sync successfully.
- Go to WiFi setting on your mobile. Then connect to the router default WiFi (SSID), which will be mentioned on router label.
- After connecting your device to a router WiFi successfully.
- Now open an Orbi app.
- Tap continue and then personalize setting page displays on your screen. From there you can customize your settings as per your requirement and need.
- After this tap continue and create a WiFi network page displays. There you choose your WiFi name (SSID) and password. And these credentials will be used to connect to the WiFi network.
- Now, setting up the admin login page displays. Choose your admin login password and these credentials will be used to access the router settings. You can even directly login without using app, just type URL orbilogin.com on a web browser.
- Tap Next. Now, Security question page displays.
Select and answer those security questions and tap next.
You can use these security questions to recover your admin username and password. - Orbi router now scans and checks whether firmware is up to date or not. This takes about 5 minutes.
- If new firmware is found by Orbi router then click on update and install it, tap next.
- Now at last, place all the Orbi satellites at their permanent locations.
Here, your Orbi WiFi system is now setup.
If you are facing any issue while setting up, you can follow these troubleshooting tips:
Troubleshooting Tips
- If your internet is not working there is a chance that router is not connected to the internet. To check that you will see Orbi purple light on your router. Ensure that all the cables are connected securely, and verify your internet connection.
You can try to restart your router if any minor issue is being faced. To restart just pull out the adapter from the plug and wait for 10 seconds. Now plug in back the adapter in a wall socket.
Hope, these troubleshooting tips helped you in resolving your problem.
Conclusion
From above we conclude that, Orbi devices typically come with a user-friendly app for setup and management. Users can easily add additional satellites to expand internet coverage as needed.


