Installing a wood stove in your basement is a great way to efficiently heat your home while adding a cozy ambiance. A wood stove can help reduce energy costs, particularly in colder climates where basements can often feel damp and chilly. However, installing a wood stove in a basement requires careful planning, attention to safety regulations, and understanding the specific challenges posed by basements, such as ventilation and chimney placement.
In this guide, we will provide a step-by-step approach to installing a wood stove in your basement, focusing on safety, efficiency, and comfort. If you’re looking for high-quality wood stoves, flue systems, and other essential accessories, Caledonian Stoves is an excellent resource for all your installation needs.
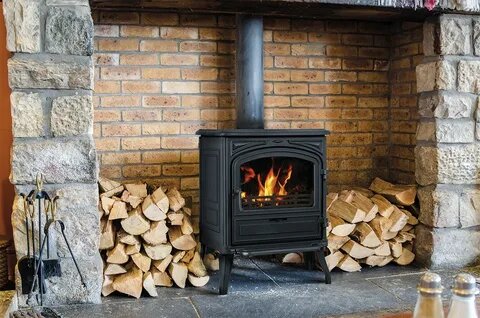
Step 1: Choose the Right Wood Stove for Your Basement
The first and most important step is choosing the right wood stove for your basement. The size of the stove will depend on the square footage of the basement, the insulation quality, and the overall layout of your home. Here are a few things to keep in mind:
- Heat Output: The heat output of a wood stove is measured in BTUs (British Thermal Units). Make sure to select a stove with enough heat output to warm not only the basement but also the rooms above it if you want to maximize your heating efficiency.
- Efficiency: Choose a stove with a high-efficiency rating to ensure that it converts the majority of the wood into heat, minimizing waste and emissions. Look for stoves that meet EPA standards for clean burning.
- Style and Size: Consider the size of your basement and how much space you have available for the stove. If you have a small basement, opt for a compact stove that still provides adequate heat. Caledonian Stoves offers a wide range of wood stoves that balance efficiency, size, and aesthetic appeal.
Step 2: Plan the Location for the Wood Stove
Where you place the wood stove in your basement is critical for both safety and effective heating. The goal is to place the stove in a central location that allows heat to radiate evenly throughout the basement and, if possible, rise into the main living areas. Here are some factors to consider:
- Central Location: If possible, place the wood stove in the middle of the basement to maximize heat distribution. Avoid placing it too close to walls, especially exterior walls, to prevent heat loss.
- Clearance from Combustible Materials: The stove should be installed a safe distance away from combustible materials like wood, drywall, furniture, and curtains. Most wood stoves require a minimum clearance of 36 inches on all sides. You can reduce this clearance by installing heat shields on nearby walls.
- Floor Protection: A wood stove must be installed on a non-combustible surface to protect the floor from heat and embers. A hearth made of tile, brick, or stone is ideal. The hearth should extend at least 18 inches in front of the stove and 12 inches on either side.
Step 3: Ventilation and Chimney Installation
Proper ventilation is essential for the safe operation of a wood stove. Unlike other rooms in your home, basements can pose unique challenges when it comes to venting the stove and installing a chimney. Depending on your home’s layout, you’ll need to decide whether to vent the stove through an existing chimney, install a new chimney, or run the flue horizontally through an exterior wall.
- Existing Chimney: If your basement has an existing masonry chimney, you may be able to connect the stove to it. However, you’ll need to install a stainless steel liner inside the chimney to ensure proper draft and prevent creosote buildup.
- Installing a New Chimney: If your basement doesn’t have a chimney, you’ll need to install a new flue system. A twin-wall insulated stainless steel flue is typically the best option for wood stoves, as it maintains the temperature of the exhaust gases, ensuring proper draft.
- Horizontal Venting: In some cases, it may be possible to vent the stove horizontally through an exterior wall. However, this method can be more challenging and may require additional considerations to ensure proper draft and airflow.
Caledonian Stoves provides a variety of chimney liners and flue systems designed for optimal ventilation and safe stove operation.
Step 4: Ensure Proper Airflow and Ventilation
One challenge of Wood burning stove installation in a basement is ensuring proper airflow. Basements are often more sealed off from the rest of the house, which can create negative air pressure and affect the stove’s ability to draw fresh air for combustion. This can lead to poor performance and even dangerous backdrafts, where smoke and gases re-enter the home.
- Fresh Air Supply: If your home is tightly insulated, you may need to install a fresh air intake vent that draws air from outside directly into the stove. This prevents the stove from competing with other appliances, like dryers or furnaces, for air.
- Circulation to Upper Floors: If you want the heat from the stove to circulate to the upper floors, you can install vents in the floor above the basement to allow warm air to rise naturally. You may also consider using fans to help distribute the heat more evenly throughout the home.
Step 5: Meet Local Building Codes and Obtain Permits
Before beginning the installation, check your local building codes to ensure your project complies with safety regulations. Most municipalities require permits for wood stove installations, especially when adding a new chimney or making structural modifications.
- Building Codes: Your local building codes will specify clearance requirements, the type of flue system allowed, and other safety considerations. Adhering to these regulations is essential to avoid fines and ensure your installation is safe.
- Permits: If you’re installing the stove yourself, make sure to obtain the necessary permits. If you’re hiring a professional, they will typically handle the permitting process for you.
Step 6: Install Safety Features
Safety is a top priority when installing a wood stove. Along with ensuring proper clearance and ventilation, you’ll need to install additional safety features to protect your home and family.
- Smoke Detectors: Install a smoke detector in the basement and in other key areas of your home to alert you in case of a fire. Test the detectors regularly to ensure they are functioning properly.
- Carbon Monoxide Detectors: Carbon monoxide (CO) is an odorless, colorless gas that can be deadly. Install CO detectors in the basement and in bedrooms to protect against CO poisoning.
- Fire Extinguisher: Keep a fire extinguisher near the stove for added safety. Make sure it’s rated for use on wood or solid fuel fires and that everyone in your home knows how to use it.
Step 7: Test the Stove
Once the wood stove is installed and connected to the chimney or flue, it’s time to test it. Start with a small fire using dry kindling and check for the following:
- Smoke Leaks: Check for smoke escaping from the stovepipe joints or around the chimney connection. Seal any gaps with high-temperature sealant.
- Draft Performance: Ensure that the chimney is creating a strong draft. If the fire struggles to stay lit or if smoke isn’t venting properly, you may need to adjust the flue or check for blockages.
Step 8: Ongoing Maintenance
Maintaining your wood stove and chimney is essential for safe and efficient operation. Creosote buildup in the chimney can lead to chimney fires, so regular cleaning and inspections are necessary.
- Chimney Cleaning: Clean the chimney at least once a year to remove creosote and soot. If you use the stove frequently, you may need to clean it more often.
- Stove Maintenance: Inspect the stove’s gaskets, glass, and stovepipe for signs of wear. Replace any damaged components as needed to keep the stove in good working order.
For chimney brushes, cleaning tools, and replacement parts, Caledonian Stoves has a wide range of maintenance supplies to keep your stove running safely and efficiently.
Conclusion
Installing a wood stove in your basement can provide a warm, inviting space while helping to heat your home efficiently. By choosing the right stove, ensuring proper ventilation, and following safety guidelines, you can enjoy the benefits of wood heating without the risk.
For high-quality wood stoves, chimney systems, and installation accessories, Caledonian Stoves is the go-to resource. Their expert advice and wide range of products will ensure that your basement wood stove installation is safe, efficient, and aesthetically pleasing.