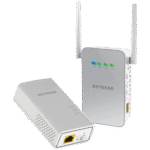
Netgear extender connects with any router of any brand. You just need to give it the internet access by connecting it to the router via Ethernet cable or WPS button. These extenders have good range and secured networks. Accessing the Netgear extender interface through IP address allows you to manage settings.
Let’s discuss the steps on how to access the Netgear interface through IP address:
Connect to the Extender Network
- Wired connections are those in which the extender connects via Ethernet port. Connect your devices like computers with the extender using an Ethernet Cable. Using an Ethernet cable does not even require a WiFi password.
- Wireless Connections are those in which we use WiFi network. You can connected your device with the extender WiFi network. This way, you can use your mobile or laptop anywhere within the range of your WiFi network.
Obtain the Extender IP Address
The default IP address for Netgear extenders is 192.168.1.250. However, this can varybased on the model or the network configuration. If this doesn’t work, you can locate the correct IP address in a few ways:
- Using Command Prompt (Windows)
> Open the Command Prompt (type `cmd` in the Start menu).
> Type `ipconfig` and press Enter.
> Look for the default gateway under the wireless LAN adapter. The IP address listed there is likely the extender’s address. - Using Network Settings (Mac)
> Open system preferences and go to network.
> Click on your active network (WiFi or Ethernet).
> Click advanced, and then navigates to the ‘TCP/IP’ tab. The IP address shown under Router is often the extender IP.
Access the Extender Interface
- Open a web browser, and type the IP address 192.168.1.250.
- Now, press Enter.
- You can also try accessing the extender through its default URL mywifiext.net or mywifiext.local.
- After this you will be directed to mywifiext login page.
Log In to Interface
- Enter the default username ‘admin’ and password ‘password’.
- If you don’t remember your credentials, try performing a factory reset on the extender to revert back to default settings.
Manage the Extender Settings
Once logged in, you will have access to various settings:
- Firmware: Check the status of your extender and update its firmware.
- WiFi Setting: Configure the extender network name (SSID) and password.
- Security Settings: Adjust the network encryption.
- Advanced Settings: View more detailed network information, set up access control, or adjust the IP configuration.
If you are still facing any difficulty to access the Netgear interface through IP address. You can follow these troubleshooting tips.
Troubleshooting Tips:
- Check the Connectivity: Ensure your device is connected to the extender network (either wired or wirelessly). And if connection is wired make sure cable is secured.
- Clear Browser Cache: Browser cache can interfere with access. Clear your cache and try again.
- Restart: A minor issue or any glitch occurs then try to restart your extender. Most of the time restarting the extender resolves the problem. To restart, unplug the adapter from your extender and wait for 30 seconds. And then plugin back the adapter on your wall socket.
- Factory Reset: If you cannot access the interface or have forgotten your login credentials, consider resetting the extender to its factory settings. There is a small reset button on the extender that you can press and hold for 10 seconds and your extender will be set to factory settings. (If there is no reset button, then there will be a small hole. Insert a pin for 10 second to reset).
Conclusion
From the above, we have concluded that the given points will allow you to access and manage the Netgear extender through IP address. If still any issue troubles you, then following these troubleshooting tips will resolve your problem.


