Introduction
As someone who’s always found solace in nature, I was thrilled to embark on the Kedarkantha Trek in the breathtaking Himalayas. This trek, with its snow-capped peaks and serene landscapes, felt like the ultimate escape from the hustle and bustle of city life. However, my excitement was tinged with nerves. Would I be prepared? Would I make it to the summit? I quickly learned that proper preparation is key, especially for first-time trekkers like me. Let me share my experience and tips to help you navigate this stunning journey.
Trekking is about more than just reaching the top; it’s about the memories and experiences you make along the route. From the camaraderie with fellow trekkers to the breathtaking views that unfold with each step, the journey becomes as important as the destination. With the right mindset and preparation, you can fully immerse yourself in this adventure and make the most of your Kedarkantha experience.
Understanding the Kedarkantha Trek
Location and Accessibility
How to Reach Sankri
Getting to Sankri, the base camp, was an adventure in itself. After a long but scenic bus ride from Dehradun, I felt the anticipation build as I entered the charming village of Sankri. The journey took about 10-12 hours, but trust me, the picturesque views along the way make it worth it! The winding roads through dense forests and quaint villages set the tone for the adventure ahead.
The friendly welcome I received from the residents made me feel right at home as soon as I arrived. Sankri is a small but vibrant village where you can find shops selling trekking gear, local food, and souvenirs. Before hitting the trails, it’s a terrific place to take in the local way of life. Spending a night here to acclimatize not only prepares your body but also allows you to connect with the community.
Best Time for Kedarkantha Trek

If you’re wondering when to embark on this trek, I’d recommend going between December and April. I went in late March, and the weather was simply perfect—not too cold, with the trails adorned in a fresh layer of snow. This time of year offers stunning views of the snow-capped peaks, and the clear skies enhance the beauty of the surroundings.
I can’t recommend The Searching Souls enough for the Kedarkantha Trek. Their passion for the outdoors and dedication to customer service ensured that every aspect of the trek was top-notch.
However, it’s crucial to note that conditions can vary. While March offers milder temperatures, trekking in January can bring heavy snowfall, making it a more challenging adventure. Researching the weather patterns and understanding what to expect can help you choose the best time for your comfort and safety.
Trek Difficulty Level
Physical Fitness Requirements
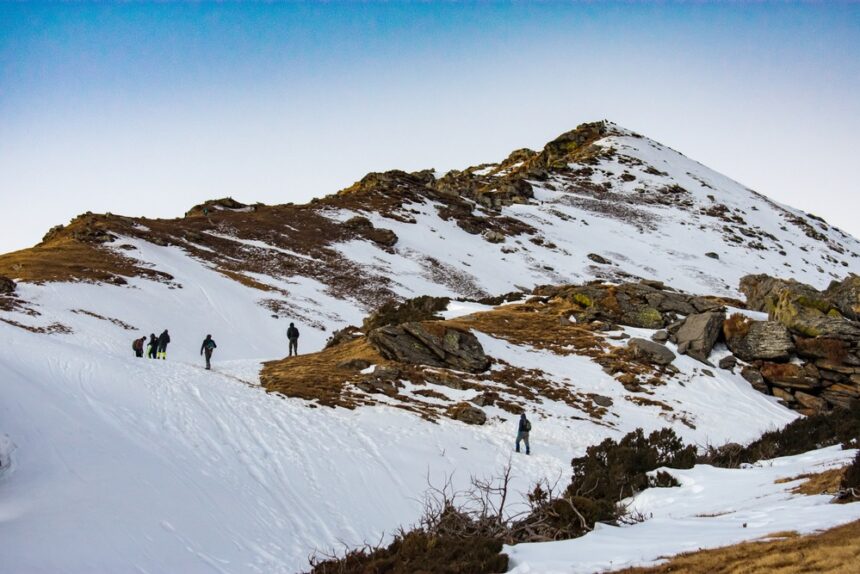
I quickly realized that while the trek is suitable for beginners, being in decent shape is essential. I’d been jogging and doing some hikes to prepare, and it made a noticeable difference in my stamina. The trek includes steep ascents and varying terrains, so building your endurance through cardiovascular workouts can help immensely.
In addition to cardio, strength training can prepare your legs for the challenges ahead. Exercises like squats and lunges helped me build the strength needed to navigate the rocky paths. Plus, don’t underestimate the importance of mental preparation; being mentally fit can keep you motivated when the trek gets tough.
Weather Conditions
Mountain weather is notoriously unpredictable. One minute it’s sunny, and the next, a snowstorm can hit. I learned to check forecasts daily and pack accordingly, just in case. Layers are key; it’s better to be slightly too warm and able to shed a layer than to be cold and regret not bringing enough warmth.
I also invested in a good-quality rain jacket and gaiters to keep my legs dry in case of snow or rain. Being prepared for sudden weather changes can make a significant difference in your trekking experience. You want to enjoy the beauty around you, not be distracted by discomfort!
Essential Gear and Packing List
Clothing
Layering Essentials
Layering became my best friend on this trek. I packed a moisture-wicking base layer, a cozy fleece, and a waterproof jacket. The moisture-wicking fabric kept sweat away from my body, while the fleece provided warmth without bulk.
Don’t forget warm hats, gloves, and thermal socks—trust me, you’ll thank yourself later! On particularly chilly mornings, I wore two pairs of socks, which helped keep my feet warm and comfortable throughout the trek.
Footwear Recommendations
A solid pair of trekking boots made all the difference for me. I chose a pair with excellent ankle support, and they held up beautifully against the rocky trails and snow. It’s crucial to break in your boots before the trek; I took mine on several shorter hikes to avoid blisters.
Additionally, I packed a pair of sandals for downtime at the campsite. After long days of trekking, slipping into comfortable footwear made a world of difference. Make sure your footwear is breathable and suitable for the terrain you’ll encounter.
Camping Gear
Tent and Sleeping Bags
Choosing the right tent and sleeping bag was crucial. I went for a lightweight tent that was easy to set up, and my sleeping bag was rated for sub-zero temperatures, which kept me warm during those chilly nights. It’s also wise to practice setting up your tent before the trek to ensure you can do it quickly when you arrive at camp.
Additionally, consider investing in a good sleeping pad. It adds insulation from the cold ground and provides extra comfort for a good night’s sleep. A well-rested trekker is a happy trekker!
Cooking Equipment
If you’re camping like I did, consider bringing a portable stove and easy-to-cook meals. I found that lightweight, dehydrated meals were perfect—they’re quick to prepare and don’t take up much space. I also packed some snacks like nuts and energy bars for quick energy boosts during the trek.
Cooking at camp became a fun social activity, where we shared meals and stories around the campfire. It’s a great way to bond with fellow trekkers and unwind after a long day on the trails.
Safety and First-Aid Kit
Must-Have Items
Safety is paramount. I packed a well-stocked first-aid kit with essentials like antiseptic wipes, band-aids, and blister treatments. You never know what you might encounter on the trail, and being prepared for minor injuries can make a significant difference in your experience.
Additionally, I included personal medications and altitude sickness tablets, just in case. Familiarizing yourself with basic first-aid techniques can also come in handy, especially if you’re trekking in remote areas.
Hydration Tips
Staying hydrated is crucial, especially at higher altitudes. I carried a sturdy water bottle and used purification tablets to ensure I had clean drinking water along the trek. It’s important to drink regularly, even if you don’t feel thirsty, to avoid dehydration.
I also learned to identify streams and snowmelt spots as potential water sources, which is helpful during longer stretches between camps. I was full of lifelong memories and simultaneously fatigued and elated.
Trekking Route and Itinerary
Day-wise Breakdown
Day 1: Sankri to Juda Ka Talab
The first day was a gentle introduction to trekking. The gradual ascent to Juda Ka Talab, a serene lake surrounded by tall pines, was magical. I was overcome with beauty and snapped away. It was the perfect way to acclimatize and enjoy the tranquility of nature.
As we trekked, I noticed how the landscape shifted from lush greenery to more rugged terrain. Each turn brought a new perspective of the mountains, and I found myself in awe of the ever-changing scenery. Arriving at Juda Ka Talab felt like stepping into a postcard, and it was a perfect spot to unwind and reflect on the day’s journey.
The campfire that night was filled with laughter and stories, creating bonds that made the trek even more enjoyable. Sharing experiences over a meal added a communal spirit to our adventure, reminding me of the importance of connection in the great outdoors.
Day 2: Juda Ka Talab to Kedarkantha Base
On day two, the trail became more challenging. We could feel the excitement building as we traveled to the Kedarkantha Base. The views along the route kept me motivated, and I felt a sense of accomplishment with every step. The trail was lined with towering pine trees, and the crisp mountain air invigorated my senses.
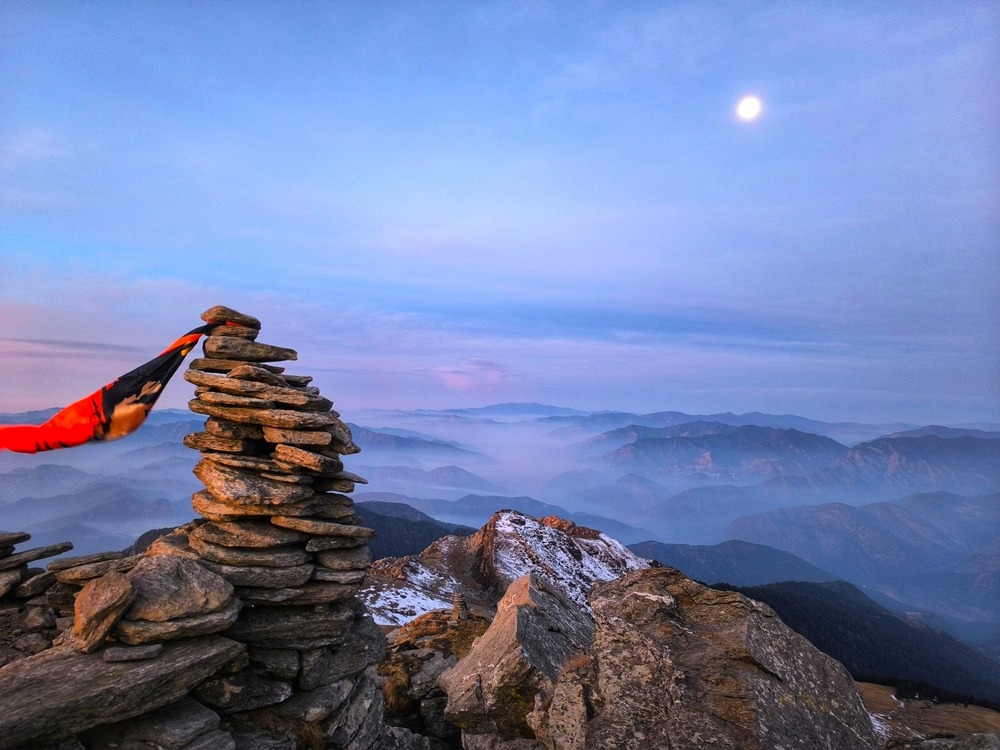
Reaching the base camp was a thrill. The campsite provided a breathtaking view of the surrounding peaks, and I couldn’t resist capturing the sunset as it painted the sky with hues of orange and pink. Sharing stories around the campfire that night with fellow trekkers created bonds that I’ll cherish long after the trek.
In the pristine Himalayan sky, the stars sprang alive as dusk approached. I remember lying back and marveling at the vastness of the universe, feeling both small and connected to something much larger than myself. The high point of my journey was this silent period of introspection.
Day 3: Summit Day

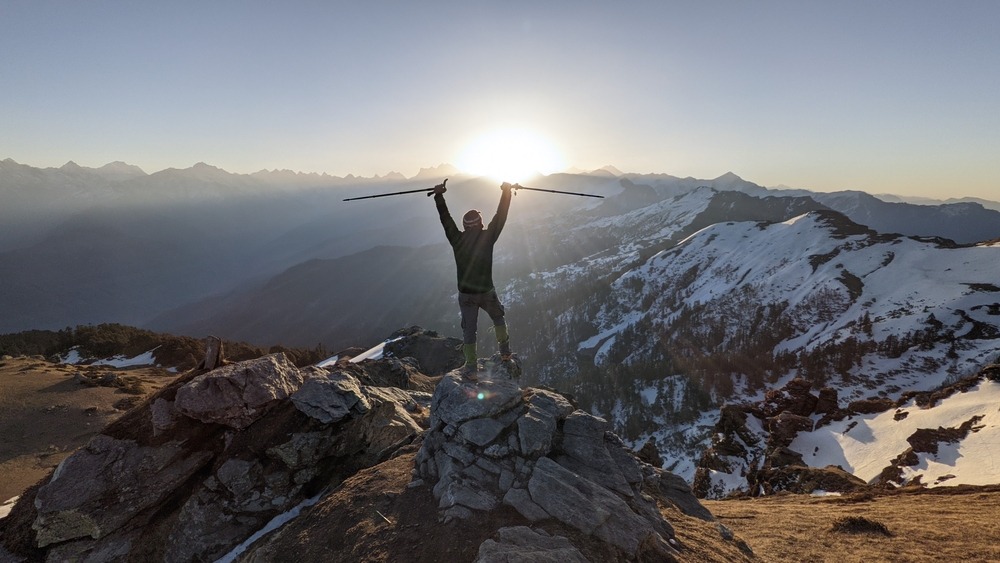
The summit day was surreal. We woke up before dawn, and the chill in the air only fueled our determination. Reaching the peak and witnessing the sunrise was one of the most awe-inspiring moments of my life. The expansive vistas rendered every bit of effort valuable.
Standing at the summit, I felt an overwhelming sense of accomplishment. It was a reminder that hard work pays off. The sight of the surrounding mountains bathed in golden light was unforgettable. Taking a moment to simply breathe and soak in the beauty was a highlight that truly made the trek worth it.
As we made our way back down, the descent offered a different perspective. I appreciated the journey even more, realizing that every part of the trek held its own beauty and challenges. Celebrating our success together added to the sense of camaraderie.
Day 4: Return Journey
While we were making our way back to Sankri, I couldn’t help but think back on the adventure. Each day had brought its own challenges and joys, and the descent was a chance to appreciate the beauty of the trails once more. The journey was enhanced by the friendships gained along the way.
Reaching Sankri felt bittersweet. I was full of lifelong memories and simultaneously fatigued and elated. The journey taught me resilience, teamwork, and the importance of enjoying the little moments along the way.
Health and Safety Tips
Acclimatization Strategies
Gradual Ascent
One of the most critical aspects of a successful trek is acclimatization. I made it a point to ascend gradually, allowing my body to adjust to the altitude. Taking breaks and listening to my body’s signals helped me stay comfortable and avoid altitude sickness.
During our trek, I noticed how others struggled with symptoms of altitude sickness. Staying vigilant and ensuring everyone in the group was okay became a collective responsibility. This sense of community support made our journey more enjoyable.
Recognizing Symptoms
Understanding the symptoms of altitude sickness is vital. I familiarized myself with signs like headache, nausea, and dizziness. Spotting these early can help you take necessary precautions. Staying hydrated and eating well also plays a significant role in combating altitude sickness.
If I felt unwell, I communicated with my guide and fellow trekkers. They were supportive and offered suggestions, which reinforced the importance of teamwork on the trek.
Staying Hydrated and Energized
Hydration Techniques
I learned early on that staying hydrated was non-negotiable. Carrying a water bottle and refilling it whenever possible kept my energy levels up. The mountain air can be dry, and I made it a point to drink regularly.
I also packed electrolyte tablets to mix into my water. They helped replenish minerals lost through sweat and kept me feeling energized. It’s amazing how a small change like this can make a difference in your overall well-being on the trek.
Snack Ideas
For quick energy boosts, I found high-energy snacks like trail mix, energy bars, and chocolate to be lifesavers. Eating small portions throughout the day kept my energy levels steady and made the trek more enjoyable. It’s important to listen to your body’s needs and fuel it adequately.
Emergency Procedures
Emergency Contacts
It’s important to have a strategy in place for crises. I made sure to save contact information for local authorities and my trekking agency. There was a sense of confidence in knowing how to get assistance if necessary.
I also communicated with my trekking group about emergency protocols, ensuring everyone was on the same page. Awareness and preparation can be the difference between a minor setback and a serious issue.
First-Aid Techniques
Brushing up on basic first-aid techniques proved invaluable. Knowing how to treat blisters, cuts, and other minor injuries helped keep everyone in good spirits. Encouraging fellow trekkers to carry personal first-aid kits made us all feel more prepared.
Understanding how to respond to altitude sickness symptoms allowed us to help one another promptly. Teamwork in the face of challenges strengthened our bonds, making the trek even more meaningful.
Navigational Skills
Using Maps and GPS
Importance of Navigation
Navigating the trails became a crucial skill as I trekked. I downloaded a GPS app on my phone, which helped me feel more secure and confident, especially in unfamiliar areas. Having a backup physical map ensured I wasn’t solely reliant on technology.
I practiced reading trail markers and using my GPS to stay on track. Familiarizing myself with the route beforehand eased my nerves and heightened my sense of adventure. Successfully navigating a trail with just a map and my instincts was immensely satisfying.
Staying on Track
Trail markers were my best guides. They kept me oriented and helped me avoid getting lost in the stunning yet confusing landscape. I often found them in the form of painted signs or small cairns, making it essential to know what to look for.
If unsure of the path, I didn’t hesitate to ask fellow trekkers or locals for directions. The trekking community is generally friendly and eager to help, which enriched my experience. Staying aware of my surroundings and being open to seeking guidance enhanced my journey.
Local Culture and Etiquette
Embracing Local Culture
Embracing the local culture enriched my trek. I took time to interact with villagers, learning about their way of life and customs. This interaction added depth to my adventure and fostered a sense of connection and respect.
Trying local foods and participating in village activities not only supported the local economy but also created lasting memories. Being open to new experiences and showing appreciation for the culture can greatly enhance your trekking journey.
Respecting Local Traditions
Understanding and respecting local traditions is vital. I made sure to ask before taking photos of people or their property, showing courtesy and respect. Engaging with the local community made my trek feel more rewarding.
I also learned about local customs and tried to follow them as best as I could. This openness fostered mutual respect and allowed me to leave a positive impression on the communities I visited.
Conclusion
The Kedarkantha Trek transcends mere physical journeying; it’s an opportunity for personal growth, self-discovery, and connection with nature. With the right preparation and mindset, first-time trekkers can navigate this incredible experience. So gear up, stay positive, and embark on an adventure that you will cherish forever!
In the end, I learned a great deal from this hike about perseverance, friendship, and the utter beauty of nature. It’s a chance to step outside your comfort zone and embrace the unknown. The memories I created on the Kedarkantha Trek will forever inspire me to seek new adventures in the great outdoors.
FAQs
- What is the best time to trek Kedarkantha? I recommend December to April, with late March to early April offering ideal conditions. The weather is generally pleasant, and the views are stunning during this period.
- What level of fitness is required for the Kedarkantha trek? A moderate level of fitness is best. Regular cardio will help prepare you. Additionally, incorporating strength training exercises can make a significant difference.
- Are there any age restrictions for the trek? No strict age limits, but it’s generally suited for individuals aged 10 and above. Children should be accompanied by adults, and younger trekkers should be physically prepared.
- What is the accommodation like on the trek? Most trekkers camp in tents, but some guided tours may offer guesthouse stays in Sankri. You can establish deeper connections with the natural world and other hikers when you camp.
- Is a guide necessary for the Kedarkantha trek? While it’s possible to trek alone, hiring a guide can enhance safety and overall experience. Guides provide local knowledge and can help navigate the trails more efficiently.


