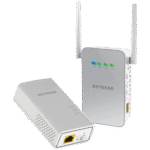
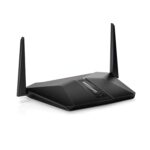
Nighthawk Range Extenders connect with home router to provide extended network coverage in big houses or offices; and at times users encounter connectivity errors. To fix such technical issues, a user must know how to reset the extender. From this guide post, you will gather knowledge about how to reset the Nighthawk extender and Nighthawk extender setup instructions to reconfigure the device again.
How to Reset Nighthawk WiFi Extender?
At the side panel of the Nighthawk WiFi extender, you will find a RESET pinhole button. Learn the below given process to reset the device:
- Press and hold the RESET button using paper pin or pen.
- Hold it for 10-12 seconds and then release it.
- After that, wait for a few minutes until the device reboots itself.
Then, you must reconfigure the device by following the Nighthawk extender setup instructions given below.
How to Reconfigure Nighthawk WiFi Extender?
The device should be configured again after the factory reset. There are three ways to connect the Netgear WiFi extender to router: WPS connection, mywifiext.net, and Nighthawk app.
WPS Method
Use WPS button to connect the extender with the router without using any wire or cable. Follow below given instructions to establish the connection:
- Plug the extender within the reach of the router in a working wall socket.
- Wait for the power LED to stop blinking and turn solid green, showing that the extender is fully booted.
- Now, press the WPS button on the extender, until the WPS LED starts blinking green, means the extender is trying to connect.
- Press the WPS button on the router and wait until the extender’s WPS LED stops blinking and turns solid green.
The extender is now set in the default settings and you can connect with the host router’s WiFi password.
Mywifiext.net
Mywifiext.net is a login URL address which helps a user to reach the Netgear Genie wizard in computer web browser. Follow steps to configure the extender in your computer via mywifiext.net.
- Connect PC with the extender network and open the web browser.
- Search the IP address 192.168.1.250 or URL mywifiext.net in the web browser.
- Click New Extender Setup and enter the Netgear account credentials.
- Choose the host router network and enter its password to connect the extender and router.
- Create the extender’s new network by typing the WiFi name and password.
- You can also use the host router’s password to create the new extended network.
Now, refresh the settings by rebooting the extender and then you can connect with the extended network.
Nighthawk App
The other method to reconfigure the extender is via Nighthawk app. Just open and access the app with the help of the Netgear account credentials.
If you don’t have any credentials, then create the account by taping the Sign Up. Now, enter your name, password and Email ID to get the Verification code. Type the code and access the app’s dashboard.
- Get into the app’s dashboard and select the Set New Device option.
- Tap the Range Extender. App will ask you to connect the phone with the extender network.
- After the connection, choose the host router’s network that you want to extend.
- Enter the password to link the extender with the router network.
- Then, enter the new extended network name and password.
- Tap SAVE and extender will take a few minutes to apply the settings.
The extender will start extending the network and now you can join the extended network easily.
The End Lines
Resetting your extender will clear out all data and set settings from the device. The extender will return to its factory settings, after that you have to run Nighthawk extender setup again to reconfigure the device. In this article, we have given instructions to reset the extender and how to reconfigure the WiFi extender.